Hello World: OpenIntegration Tutorial
Our tutorial for everyone who wants to find a way to show their own integrations on their OpenPaper.
With this short tutorial we want to show you how easy it is to program a standalone OpenIntegration extension and then use it in the paperlesspaper app as an integration plugin.
All you need for thisare some knowledge of HTML/CSS and experience with Docker, as well as a server or cloud instance from the provider of your choice. The only important thing is that the server is reachable from the Internet via some domain with a valid SSL certificate. For real tests we of course recommend our OpenPaper7 or OpenPaperL.
Well then, let's get started!
Directory structure
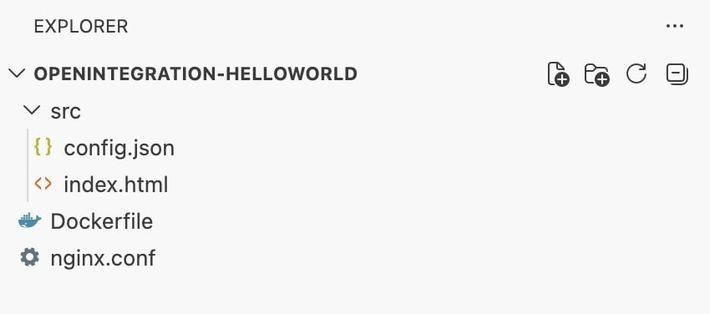
So here is our basic structure. We need a Dockerfile to pack our integration later into a Docker container. Since an OpenIntegration must serve HTML files and config.json via a web server to the paperlesspaper app, we decided on NGINX as the web server - hence nginx.conf. The Docker image we create will therefore be based on nginx:alpine.
In the /src folder are the two files that are minimally required for an OpenIntegration: config.json and index.html
In the config.json the metadata for your OpenIntegration can be specified: name, description and version number. In addition, this is where settings are configured that the user of your integration can later set themselves. In our example this is only a text field for entering a name.
Here is our
config.json
{
  "name": "This one is a basic Hello-World example, which greets you with your name",
  "version": "1.0.0",
  "description": "A simple plugin that displays a greeting message based on the user's name.",
  "nativeSettings": {
    "orientation": "portrait"
  },
  "formSchema": {
    "type": "object",
    "properties": {
      "name": {
        "type": "string",
        "description": "The name of the user to greet.",
        "default": "OpenPaper-Lover"
      }
    }
  },
  "renderPage": "./index.html"
}
Under nativeSettings you can pass settings for the picture frame, for example that your integration runs only in portrait mode. The formSchema section defines our text input field. Important is the specification of the renderPage — that is the relative path within your server domain where the file that returns the image for the picture frame is located. Here we are content with a simple text input field named: "name". If you want to know more about what options exist for input fields you can here view the type definition of the interface.
For our index.html we only need the following basic HTML skeleton:
index.html
<!doctype html>
<html lang="en">
  <head>
    <meta charset="UTF-8" />
    <meta name="viewport" content="width=device-width, initial-scale=1.0" />
    <title>Openintegration: Hello World</title>
  </head>
  <body>
    <div id="website-has-loading-element" class="hidden-marker"></div>
    <main class="screen">
      <section>
        <h2 class="subtitle">Hello</h2>
        <h1 class="title" id="name">World</h1>
        <h4 id="clock">00:00</h4>
      </section>
    </main>
  </body>
</html>
Not much happens here, except that Hello World is displayed. The <div id="website-has-loading-element" class="hidden-marker"></div> tells our rendering server that the webpage is only fully loaded when a div with id="website-has-loaded" is present on the page.
If you use asynchronous calls or large graphics in your integration, this may be necessary. Otherwise our rendering server will abort after a few seconds and will only render what has been loaded up to that point. You can take a look at it in your browser to get an idea of how it would finally look on your OpenPaper.
At this point it should look approximately like this:
 Das erste html wird auf dem Rahmen angezeigt
Styling
Since we want it to look a little nicer, we need to add some CSS in the HTML header:
<style>
      :root {
        color-scheme: light dark;
      }
      * {
        box-sizing: border-box;
      }

      html,
      body {
        width: 100%;
        height: 100%;
        margin: 0;
        padding: 0;
        font-family:
          ui-sans-serif,
          system-ui,
          -apple-system,
          BlinkMacSystemFont,
          "Segoe UI",
          sans-serif;
        background: #fff;
        color: #000;
      }

      .screen {
        width: 100vw;
        height: 100vh;
        padding: 1.3em;
        display: flex;
        align-items: center;
        justify-content: center;
      }

      .title {
        font-size: clamp(1rem, 1.4vw + 0.8rem, 2rem);
        font-weight: 600;
        text-align: center;
        margin: 0 0 0.2rem 0;
      }

      .subtitle {
        font-size: clamp(0.9rem, 0.9vw + 0.6rem, 1.3rem);
        opacity: 0.75;
        text-align: center;
        margin: 0 0 0.2rem 0;
      }

      #clock {
        font-size: clamp(0.5rem, 0.5vw + 0.2rem, 0.8rem);
        opacity: 0.25;
        text-align: center;
        margin: 5rem 0 0.2rem 0;
      }

      .hidden-marker {
        position: absolute;
        width: 1px;
        height: 1px;
        overflow: hidden;
        clip: rect(0, 0, 0, 0);
        white-space: nowrap;
      }
    </style>
Much better, right?
 Jetzt mit Formatierung
All we need now is a bit of JavaScript. We want to display Hello "Name from the settings", not just "World". We also add the rendering time, which is useful to check whether the image actually updated after code changes. So you need the following code block at the end (before the closing body tag) of your source:
<script>
    // live clock
    const clockElement = document.getElementById("clock");
    const now = new Date();
    const hh = String(now.getHours()).padStart(2, "0");
    const mm = String(now.getMinutes()).padStart(2, "0");
    clockElement.textContent = `${hh}:${mm}`;

    // mark page loaded
    const markLoaded = function () {
      const markerLoaded = document.createElement("div");
      markerLoaded.id = "website-has-loaded";
      document.body.appendChild(markerLoaded);
    };


    // Handling Settings Page Updates
    window.addEventListener("message", (event) => {
      const data = event.data;
      const payload = data.data || {};
      if (data.type === "INIT" && data.cmd === "message") {
        if (payload.meta?.pluginSettings?.name) {
          document.getElementById("name").textContent =
            payload.meta?.pluginSettings?.name;
        }
        markLoaded();
      }
    });
  </script>
As described in our documentation we add an event listener to the page that listens for the message event. Since several messages are exchanged between the app and the integration, we are only interested in the message when it has the type="INIT" and cmd=="message" . The field we previously created in the config.json , the created field for the name (name) can be found in the received JS object under payload.meta?.pluginSettings?.name; . We now write the contained string into our HTML headline with the ID name.
To inform the rendering engine that we are finished loading and displaying data, the function markLoaded is called. This appends to the end of the document a div with the id website-had-loaded . Done!
Dockerfile and nginx.conf
If you now want to make your integration available on a Docker host, you can simply use the following Dockerfile:
FROM nginx:alpine
# Remove default nginx config and content
RUN rm /etc/nginx/conf.d/default.conf && \
    rm -rf /usr/share/nginx/html/*
# Copy optimized nginx config
COPY nginx.conf /etc/nginx/nginx.conf
# Copy static files
COPY src/ /usr/share/nginx/html/
EXPOSE 80
CMD ["nginx", "-g", "daemon off;"]
As you can see we copy an nginx.conf into the Dockerfile. This is also quite simple. You just need to make sure that the CORS headers are set correctly:
worker_processes auto;
events {
    worker_connections 1024;
}
http {
    include /etc/nginx/mime.types;
    default_type application/octet-stream;
    sendfile on;
    keepalive_timeout 65;
    server {
        listen 80;
        server_name _;
        add_header Access-Control-Allow-Origin "*" always;
        add_header Access-Control-Allow-Methods "GET, POST, PUT, PATCH, DELETE, OPTIONS" always;
        add_header Access-Control-Allow-Headers "Authorization, Content-Type, Accept, Origin, X-Requested-With" always;
        root /usr/share/nginx/html;
        index index.html;
        location / {
            if ($request_method = OPTIONS) {
                return 204;
            }
            try_files $uri $uri/ =404;
        }
    }
}
The Access-Control-Allow-Origin must be set so that at least web.paperlesspaper.de, api.paperlesspaper.de, capacitor://localhost (for iOS) and http://localhost (for Android) are allowed. In the example we allow all URLs for simplicity.
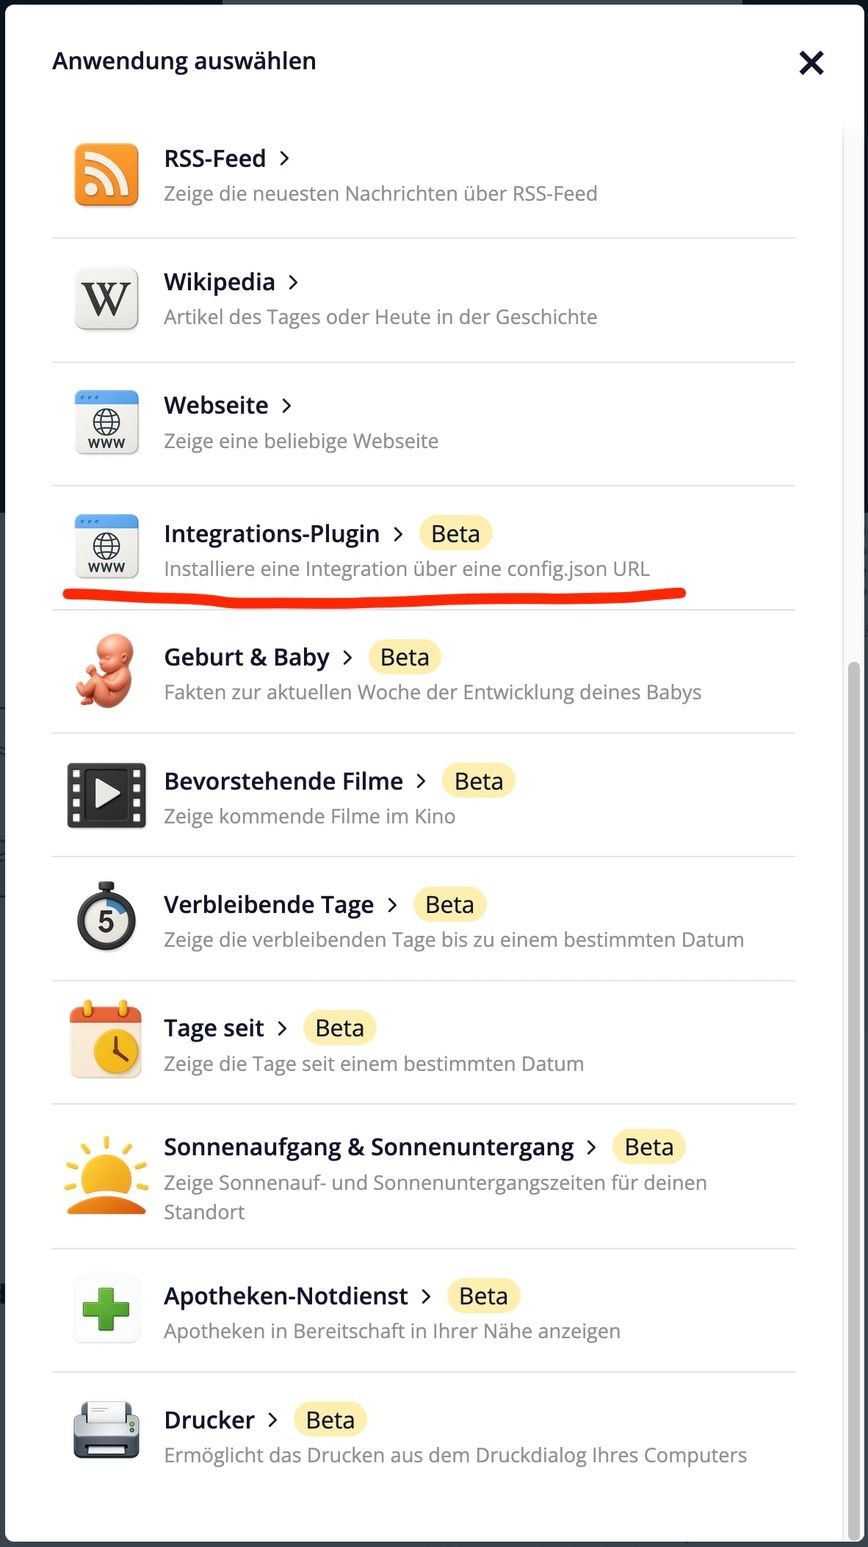
How do you add your integration in the paperlesspaper app? Very simple:
- In the app go to the library and click "New Image"
- From the list select "Integrations Plugin"
On the settings page that appears you now have to enter a link to your config manifest (config.json ).
For our example domain helloworld.paperlesspaper.de this would be:
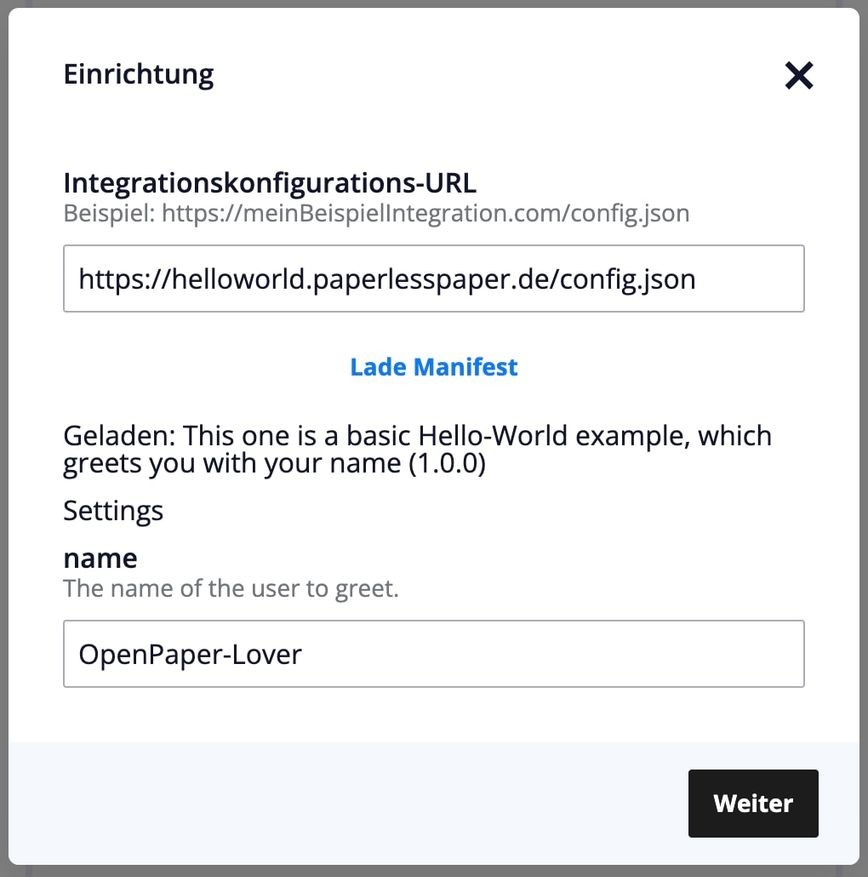
After entering the integration configuration URL and clicking "Load" the input field name. Here you can enter the desired name that will then be displayed on the OpenPaper.
After clicking "Next" and selecting the desired frame in the next dialog, your integration is active. The desired display will be shown on the OpenPaper after the next refresh interval.
That's it! You can find the complete source code in the Openintegration-HelloWorld-Github-Repository.
Have fun with it! Questions and comments welcome at support@paperlesspaper.de
